How To Plan A Practical Kitchen Refresh Without Moving Plumbing
A practical step-by-step guide to how to plan a practical kitchen refresh without moving plumbing, including preparation, instructions, common issues, tips, and next steps.
How To Plan A Practical Kitchen Refresh Without Moving Plumbing
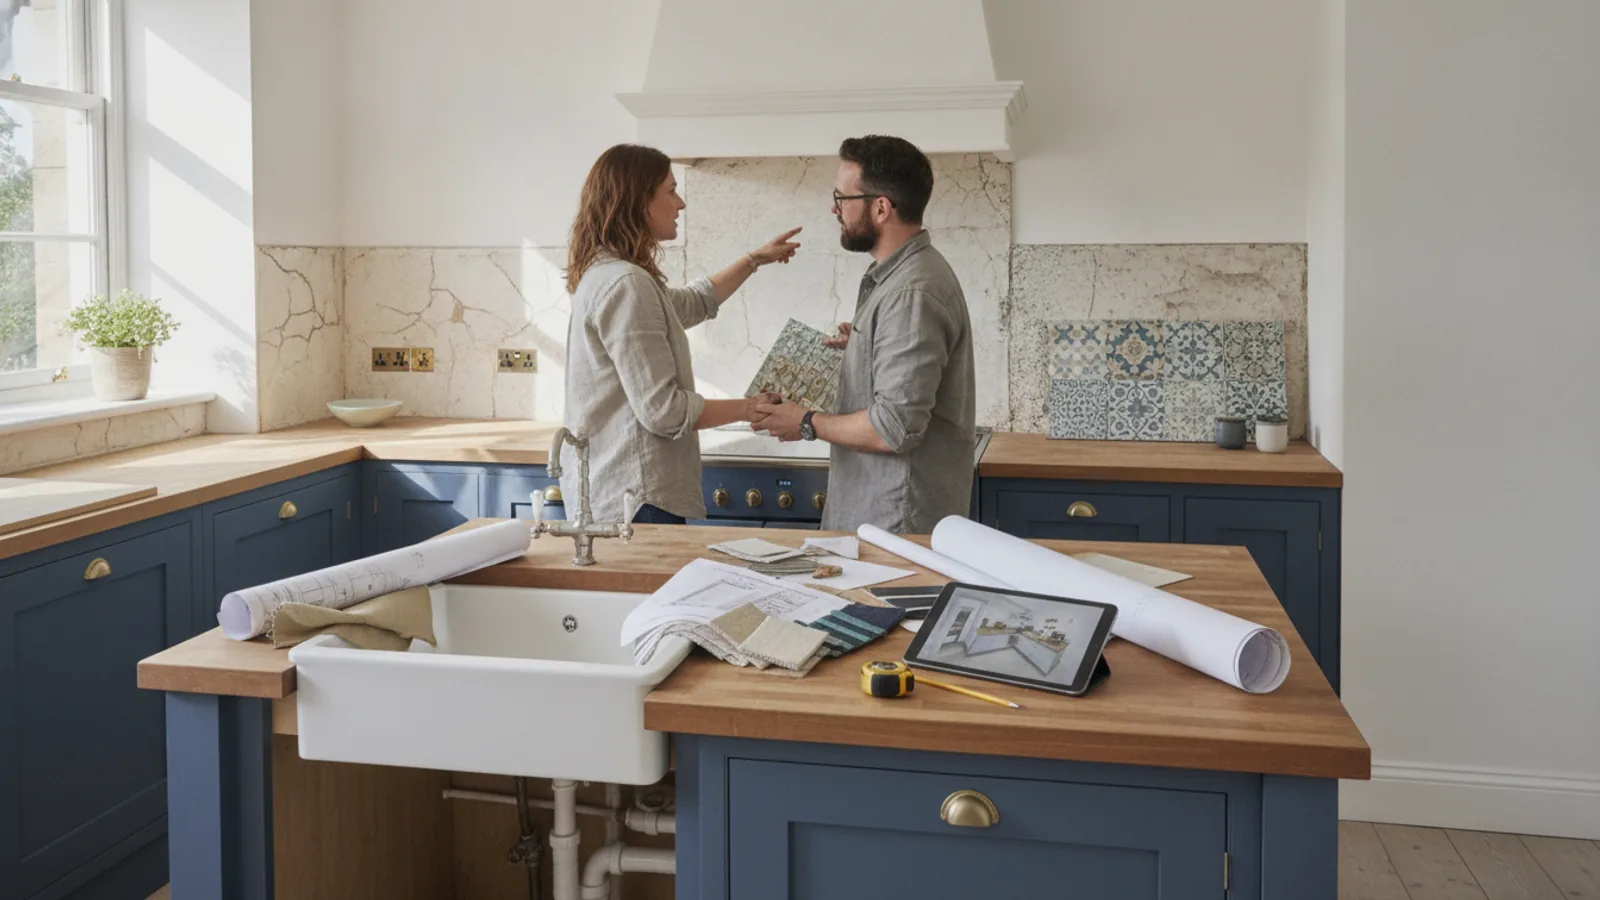
This guide provides a practical, step-by-step approach to refreshing your kitchen without the expense and disruption of moving plumbing. By focusing on surface updates, smart storage, and strategic layout tweaks, you can achieve a significant visual and functional upgrade. The plan emphasizes careful measurement, durable material choices, and DIY-friendly techniques that respect your existing water and gas line locations. Whether you're updating cabinets, replacing countertops, or improving lighting, this guide helps you prioritize tasks, avoid common pitfalls, and ensure a cohesive result. With a focus on planning, prep, and execution, you'll learn how to transform your kitchen's look and usability while keeping costs manageable and maintaining safety for you and your family.
Fast Answer
- Start by thoroughly measuring your existing kitchen and mapping out all plumbing, electrical, and gas lines so you can plan changes that avoid moving them.
- Focus on high-impact, low-cost updates like painting or refacing cabinets, swapping hardware, upgrading lighting, adding a backsplash, and installing new countertops or a sink that fit the current layout.
Before You Start
- Before buying anything, measure every cabinet face, drawer front, countertop section, backsplash area, and appliance opening. Record these dimensions in a notebook or digital file, and double-check them twice to ensure accuracy when ordering new materials.
- Take clear photos of your existing kitchen, including overhead shots, close-ups of cabinet hinges, sink under-mount clips, and any trim details. These photos will serve as a visual reference during planning and help you choose replacements that match your style.
- Create a detailed layout diagram on graph paper, plotting the current positions of the sink, stove, refrigerator, and all cabinets. Mark the exact location of water supply lines, drain pipes, and the main gas shut-off valve if present, so you know what areas are off-limits for changes.
- Set a realistic budget that includes a 10-15% contingency for unexpected issues like damaged plumbing, electrical wiring, or materials that need to be reordered. Prioritize your wish list into must-haves and nice-to-haves, and decide which tasks you'll handle yourself versus hire out.
Step-by-Step Instructions
Assess Your Current Kitchen and Set Priorities
Begin by stepping back and evaluating what actually bothers you about your current kitchen. Is it the dated cabinet color, the worn countertop, insufficient lighting, or lack of storage? Make a list of everything that feels outdated or inefficient, then rank them by priority: cosmetic issues like paint and hardware are usually the easiest to fix, while functional problems like poor work triangle flow might require more thought. Since you're committing not to move plumbing, the positions of the sink and stove are fixed, but you can still improve the workspace around them. Add a note next to each item on your list about the likely scope of work: simple DIY, moderate effort, or professional. This assessment will guide your budget and time allocation. As you plan, picture how each change will affect your daily routine—for instance, adding a pull-out shelf beside the dishwasher can make unloading easier. By focusing on the most impactful issues first, you'll ensure your kitchen refresh delivers the biggest visual and practical improvement for your effort.
Design a Refresh Plan That Respects Your Layout
Now that you have a priorities list, translate it into a concrete plan. Use your measured diagram to sketch potential changes: if you're replacing cabinets, ensure all new cabinets fit within the same footprint, leaving the plumbing and electrical where they are. If you're installing open shelves instead of upper cabinets, check that the wall is clear of any pipes or wiring—a simple knock test or a stud finder with a depth sensor can help. For countertops, choose materials that match your existing sink cutout dimensions unless you're also replacing the sink, in which case pick a sink that fits the current base cabinet size. If you're adding a backsplash, decide on the height and finish; ensure it extends only to areas that don't interfere with outlets or light switches that you're keeping. For a kitchen island, consider a portable cart or a butcher-block counter on casters that doesn't require any floor changes. As you finalize your plan, double-check clearances: leave at least 36 inches of walking space in front of appliances and 24 inches in front of a dishwasher for loading and unloading. This design phase is your blueprint—change it now, not halfway through installation.
Purchase Materials and Prep Your Workspace
With your plan approved, it's time to gather all materials, tools, and hardware. For a kitchen refresh, common purchases include cabinet paint and primer, new handles or knobs, a countertop like laminate or butcher block that can be cut to size, backsplash tiles and adhesive, sink if replacing, and caulk. Check that your existing sink is the standard size for your countertop cutout; if you're installing a new sink, measure the base cabinet interior width to choose an appropriate model. Order all items well in advance and confirm fit with the retailer if anything seems off. Before beginning any work, clear out all cabinets and drawers, remove wall art and small appliances from counters, and cover adjacent floors with drop cloths. Disconnect and cap off water lines only if you're replacing a sink or faucet; otherwise, leave plumbing untouched. Set up a staging area in another room for tools, parts, and hardware organized in labeled bins. This prep work prevents lost screws, misplaced pieces, and unnecessary trips to the store. Additionally, inspect the area for any existing damage like water stains or mold—address these issues before covering them up with new materials.
Execute the Cabinet and Countertop Updates
Start with the most transformative change: giving your cabinets and countertops a fresh look. If you're repainting cabinets, remove the doors and drawer fronts, clean them thoroughly with a degreaser, lightly sand the surfaces to help paint adhere, and then apply a high-quality primer followed by two coats of paint. Use a foam roller for a smooth finish on flat panels and a brush for edges; allow each coat to dry completely. To avoid going crazy with door alignment later, label each door and its corresponding opening (e.g., 'upper left' on the back of the door and on the frame). While the paint dries, you can tackle the countertops. If you're installing a laminate or butcher block over the existing base, carefully measure and cut the new top with a circular saw guided by a straight edge, then secure it with construction adhesive and screws from below. For a simpler update, consider resurfacing your existing countertop with a kit designed for that purpose—just be sure to follow the manufacturer's instructions exactly, including proper surface prep and adequate ventilation. When reattaching cabinet doors, replace the hinges if they're worn, and adjust the screws to ensure doors line up evenly. Finally, install new hardware like knobs or pulls, making sure they're placed at a comfortable height and alignment which you mark with a template to keep consistent.
Upgrade the Sink, Faucet, and Appliances Within the Same Footprint
Refreshing your sink and faucet is a high-impact change that you can do without moving pipes, as long as you choose items that fit the existing plumbing connections and countertop cutout. First, measure the width of your current sink base cabinet and the length from the back wall to the front edge; you'll need a sink that fits these dimensions. If your sink is under-mounted, you can replace it with a similar type; if it's top-mount, ensure the new one matches the cutout size or expand the cutout carefully if the worktop allows. Turn off the water supply under the sink, detach the P-trap and drain lines, and unscrew the faucet from the countertop. When installing the new sink, apply plumber's putty around the rim for top-mount styles or use clips for under-mount; ensure a watertight seal. Connect the supply lines (make sure the hot and cold are correctly oriented) and the drain, and tighten with a wrench but avoid overtightening. For faucets, choose one with a standard 3-hole or single-hole configuration that matches your sink's existing holes. If you're also replacing the dishwasher or refrigerator, verify that the new models have the same width, depth, and height as your current units, and that the water and electrical connections are located in compatible positions. This way, you can slide them into the same openings without altering the utility lines.
Add Lighting and Finishing Touches for a Polished Look
Lighting can dramatically change the feel of your kitchen, and it doesn't require moving plumbing. Evaluate your current light fixtures: are they harsh, dim, or poorly positioned? Consider replacing a dated ceiling fixture with a modern flush-mount LED light that matches your style. Carefully turn off the power at the circuit breaker, then use a voltage tester to confirm no electricity is flowing. Disconnect the old fixture, remove it, and install the new one by connecting the wires (black to black, white to white, ground to ground) and securing it to the box. If your kitchen lacks under-cabinet lighting, add battery-operated or plug-in LED strips that adhere under the upper cabinets, providing task lighting for food prep without any hardwiring. For the finishing touches, install a new backsplash—peel-and-stick tiles are an easy DIY option that requires no mortar just clean walls and measured cutting. After all installations, clean every surface, touch up paint, and reattach any outlet covers. Step back and assess the space: do the cabinet pulls align, are doors level, and is the caulk smooth? Make final adjustments, then step into your refreshed kitchen and enjoy a space that looks inviting and functions better, all without moving a single pipe.
Quick Reference
| Situation | Action | Why it helps |
|---|---|---|
| You want to replace the kitchen sink but cannot extend the plumbing lines. | Choose a sink with the same dimensions and mounting style as your current one, using the exact sink base cabinet width and countertop cutout size as your guide. | This guarantees a perfect fit without altering the plumbing connections, preventing the need for invasive and costly drain or supply line work. |
| Your upper cabinets look dated but you want to avoid the mess of demolishing them. | Remove the doors, sand surfaces lightly, apply a bonding primer, then use a high-quality enamel paint specifically for cabinets, and attach new hardware. | Repainting dramatically freshens the kitchen while preserving the current layout and cabinet boxes, saving money and time compared to full replacement. |
| The kitchen lacks adequate lighting, especially over the countertops, but you can't run new wiring. | Install battery-operated or plug-in under-cabinet LED light strips along the bottom of upper cabinets, and replace any overhead fixture with a hardwired LED light using the existing junction box. | These options add functional lighting without requiring new electrical circuits, keeping the project DIY-friendly and within your existing infrastructure. |
Common Issues
- Cabinet doors are not aligned after repainting.: Loosen the screws on the hinges slightly, adjust each door so it is level and even with its neighbors, then re-tighten the screws. You may need to adjust the top, bottom, or side adjustments depending on the hinge type. Check with a level and make fine adjustments until the gaps are consistent.
- Under-cabinet lights cast a shadow on the countertop due to placement.: Move the strips closer to the front edge of the cabinet, ideally positioning them about 2 inches from the front. This spreads the light across the entire countertop, reducing shadows from tall items like coffee makers or toasters.
- New countertop material feels uneven or has gaps along the seam.: For laminate or butcher block seams, use a router to smooth the edges and then apply a bead of wood glue or construction adhesive, clamp the pieces together until dry, and fill any small gaps with color-matched caulk. For existing counters, apply a countertop resurfacing kit that includes a bonding agent and a top coat to create a smooth surface.
Advanced Tips
- Use a laser level when installing new shelves, range hoods, or backsplashes to ensure perfectly horizontal placement, which is especially important if your floors or ceilings are slightly uneven.
- Replace standard outlet covers in the kitchen with fresh, neutral-colored ones and consider installing a GFCI outlet near the sink if there isn't one already (check wiring and local codes, or hire an electrician if unsure).
- Apply a clear, matte or satin finish to repainted cabinets to protect them from moisture and grease buildup, making them easier to wipe clean and extending the life of your paint job.
Final Checklist
- Confirm that all water supply lines, drain pipes, and gas lines remain in their original positions and have not been accidentally moved or tampered with during this refresh.
- Test all new fixtures, including sink, faucet, and under-cabinet lights, to ensure they operate properly and have no leaks or electrical issues.
- Inspect every new seam, joint, and painted surface for smoothness, ensuring that caulk is applied neatly and that cabinet doors align perfectly without gaps.
- Clean all surfaces thoroughly, remove all protective coverings, and walk around the kitchen to ensure there are no leftover tools, screws, or debris that could pose a hazard or detract from the refreshed look.
FAQ
What is the best way to change the look of my kitchen without moving plumbing?
Focus on high-visibility updates like painting or refinishing cabinets, installing new countertop surfaces such as laminate or butcher block that fit your existing layout, adding a fresh backsplash, and upgrading faucets and lighting. These changes transform the space's appearance and functionality while keeping all water and drain lines untouched. Prioritize what bothers you most—whether it's worn surfaces, poor lighting, or outdated hardware—and tackle those first, using the same measurements and utility locations to guide your choices.
Can I replace a kitchen sink without altering the plumbing?
Yes, you can replace a sink without moving plumbing if you choose a replacement that matches the dimensions, mounting style (top-mount or under-mount), and the number of mounting holes of your current sink. Ensure the new sink fits the existing cutout in the countertop and connects to the same supply lines and drain. Turn off the water supply, disconnect the old sink, and install the new one following the manufacturer's instructions, being mindful of the alignment to prevent leaks. If you're unsure about the connections, consult a plumber to ensure a proper fit.
What are some low-cost ways to update a kitchen without changing the layout?
Low-cost updates include painting cabinets and walls, swapping out cabinet handles and knobs for a modern style, installing peel-and-stick backsplash tiles, replacing a dated sink faucet with a new one, and adding under-cabinet lighting via plug-in or battery-operated strips. You can also update the countertop with a resurfacing kit or a new laminate that fits the existing base. Refresh drawer liners, fill any gaps with caulk, and replace outlet covers for a clean finish. These changes are affordable and can be completed without professional help, dramatically enhancing the kitchen's appearance.