Common Mistakes When Planning Choosing Lighting Layers For A Dining Room
A practical step-by-step guide to common mistakes when planning choosing lighting layers for a dining room, including preparation, instructions, common issues, tips, and next steps.
Common Mistakes When Planning Choosing Lighting Layers For A Dining Room
Planning lighting layers for a dining room goes beyond picking a pretty chandelier. Many homeowners make avoidable mistakes that leave the space feeling flat, uninviting, or impractical. This guide walks you through the most common pitfalls—such as relying on a single overhead light, choosing the wrong color temperature, or ignoring the dimmer switch—and shows you how to design a balanced, flexible lighting scheme. You'll learn how to layer ambient, task, and accent lighting to suit everyday meals, dinner parties, and quiet corners. With practical steps, quick-reference tips, and troubleshooting advice, you'll be able to create a dining room that feels warm, functional, and beautiful at any hour.
Fast Answer
- Always plan for at least three layers of light: ambient for general visibility, task for focused activities like reading or serving, and accent to highlight art or architectural details.
- Install dimmers on every circuit so you can adjust the mood from bright and energetic to soft and intimate, depending on the occasion.
Before You Start
- Measure your dining table and the room's dimensions to determine the ideal fixture size and suspension height for proportion and clearance.
- List all the activities you'll do in the room, like family dinners, homework, or board games, to know which lighting zones you truly need.
- Choose a color temperature plan: warm (around 2700K) for cozy dinners, neutral (3000K) for versatile use, and cooler (3500K) for task lighting if you'll work at the table.
- Sketch a simple floor plan marking where you want each light source—overhead, table, wall sconces, floor lamps—to visualize balance and avoid dark corners.
Step-by-Step Instructions
Assess Your Dining Room's Architecture and Daily Use
Start by standing in your dining room at different times of day and noting where light naturally falls and where shadows linger. Measure the ceiling height, table length, and the distance from the table edge to walls and sideboards. Consider how you use the room: do you host long dinner parties, have children doing homework, or use the table for remote work? This assessment tells you the type and placement of each layer. For instance, a low ceiling may call for flush-mount ambient fixtures, while a tall ceiling can accommodate a pendant with a longer drop. Also, note any architectural features like beams or alcoves that could house accent lights. This step prevents you from buying fixtures that are the wrong size or that crowd the space.
Design the Ambient Layer for Overall Illumination
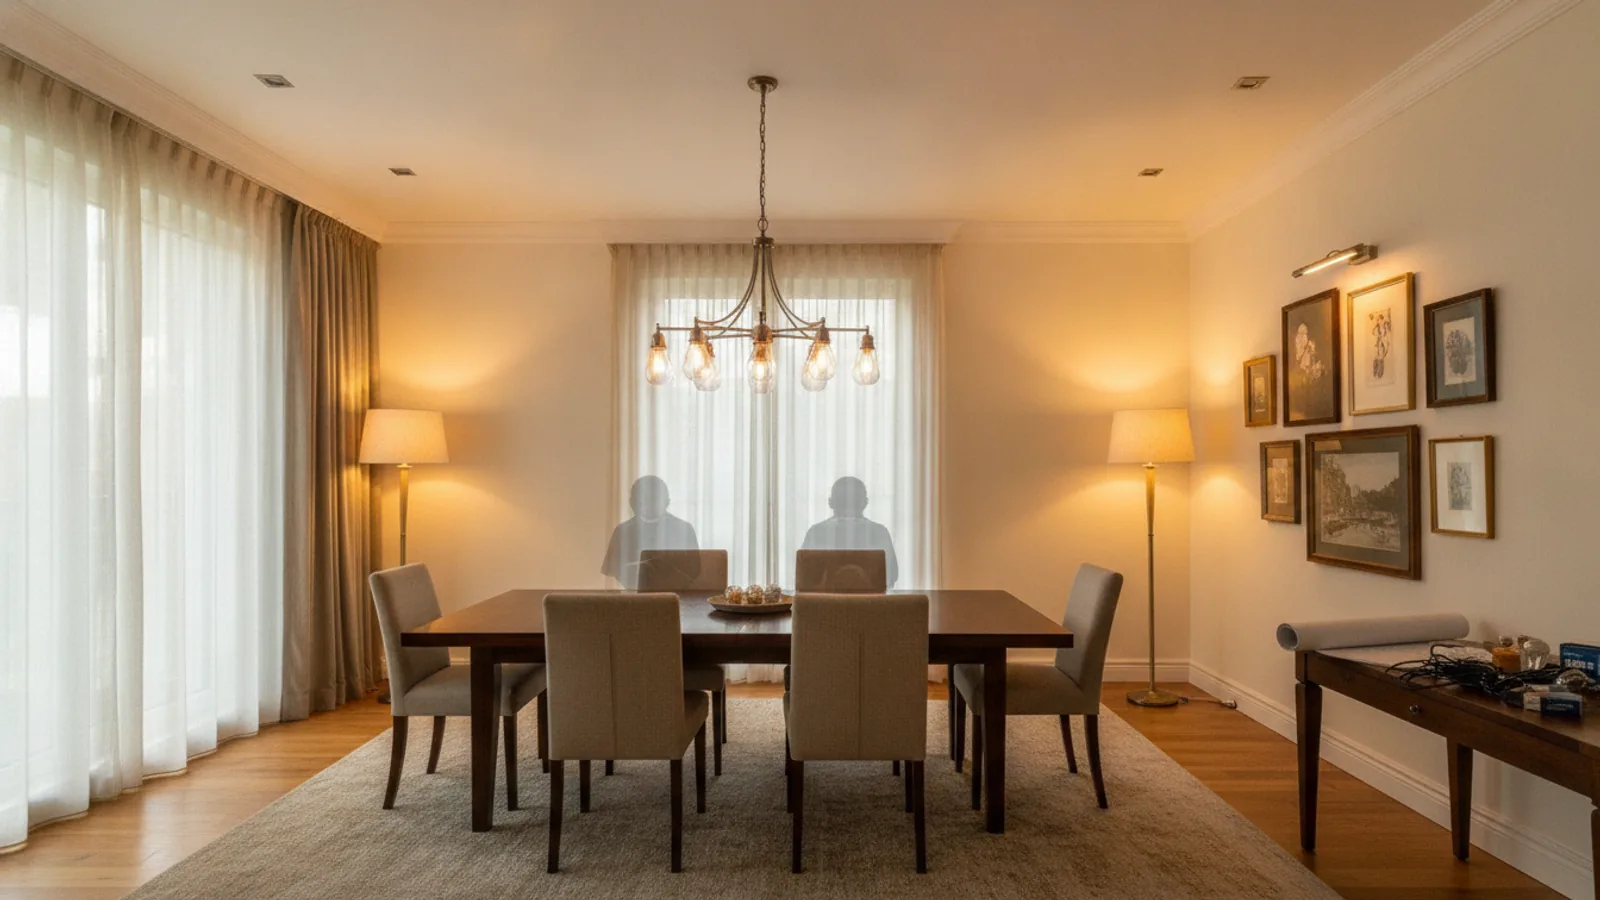
Ambient light is the base layer that fills the room with soft, general illumination so you can move safely and see the space as a whole. In a dining room, this often comes from a ceiling fixture, but it can also be supplemented by cove lighting, recessed downlights, or a lamp aimed upward. Choose fixtures that distribute light evenly without creating glare. For most rooms, aim for a total output that matches the room size—roughly 2 to 4 watts of LED per square foot, but verify against the fixture's lumen rating. Install the ambient source on a dimmer so you can lower it for mood. Place the main fixture centered over the table, not the room, to avoid a cold, empty middle. Test your layout by using a work light on a ladder before you commit to wiring.
Layer Task Lighting for Specific Activities
Task lighting focuses on areas where you need to see clearly, such as reading a menu, serving food, or assisting a child with art projects. In a dining room, this often means adjustable wall sconces, a floor lamp next to a reading chair, or under-cabinet lights on a buffet. Place these so they shine on the work surface without casting shadows from your body. For example, a swing-arm sconce on each side of a buffet provides even light. When choosing fixtures, consider their direction and intensity; a gooseneck lamp can be aimed precisely. Install task lights on their own switches, separate from ambient, so you can use them independently. Always check that the light level is sufficient for the task—about 3 to 5 times the ambient level is a good rule, but verify with a light meter app if needed.
Add Accent Lighting to Showcase Features
Accent lighting adds drama and depth by drawing attention to artwork, a textured wall, a sideboard display, or architectural details like a tray ceiling. Use adjustable recessed spotlights, track heads, or picture lights aimed at the object. The key is to create contrast: the accent light should be at least three times brighter than the ambient level on the highlighted area. Place lights at a 30-degree angle to the object to avoid glare. For artwork, use a picture light with a proper beam spread that doesn't hit the frame. For a dramatic effect, experiment with uplighting a plant or a sculpture. Keep accent lights on a separate circuit or dimmer so you can turn them off when you want a simpler look. Remember: accent lights are for seeing the art, not for reading.
Choose Fixture Styles and Bulb Temperatures That Flatter
Now that you've planned the layers, select fixtures that match your room's decor and serve their function. For the table, a pendant or chandelier should hang 30 to 36 inches above the tabletop, but adjust for ceiling height and fixture size. The fixture's diameter should be about half to two-thirds the width of the table. Choose bulbs with a color rendering index (CRI) of 90 or above to make food and faces look natural. For a warm, inviting feel, pick bulbs around 2700K; for a more energetic and crisp look, use 3000K. Avoid mixing warm and cool bulbs in the same room, as it can feel dissonant. If your fixtures are exposed bulbs, use a diffuser if the light is too harsh. Always check the bulb base and maximum wattage for each fixture.
Install Dimmer Switches and Test Your System
Dimmers are the most important control element for layered lighting because they let you change the mood instantly, from bright for cleanup to candlelit for dinner parties. Install dimmers for each circuit (ambient, task, accent) so you can adjust them independently. Modern dimmers with a smooth slider are easy to use, but you can also choose smart controls if you like automation. After installation, test each layer individually and then together. Walk around the room at night and check for dark spots, glare, or flickering. Use a phone camera to see if the lights are flickering (which the eye may not catch) and replace any incompatible bulbs. Also, test the dimmer range to ensure it doesn't buzz. This final test ensures your lighting scheme works as intended before you live with it.
Quick Reference
| Situation | Action | Why it helps |
|---|---|---|
| You have a large dining room with a long table and high ceiling, but the room feels dim and cold. | Install two or more pendant lights over the table, spaced evenly, plus add wall sconces or floor lamps to raise the ambient level to a comfortable brightness. | One small fixture cannot illuminate a large space evenly; multiple sources distribute light and eliminate dead zones. |
| You have an art collection on the walls that you want to showcase, but the existing lighting washes them out. | Replace overhead floodlights with adjustable track heads or picture lights aimed directly at each artwork, and install a separate dimmer for those accent circuits. | Focused accent lights with higher contrast make the art the focal point, while a separate dimmer lets you control the drama without affecting the rest of the room. |
| You often host dinner parties and want to create a cozy, intimate atmosphere, but your current lights are all on one switch. | Install dimmer switches on each circuit (ambient, task, accent) and set presets: bright for serving, medium for dining, low for coffee and conversation. | Separate dimmers give you flexibility to create multiple scenes, preventing the all-on or all-off—too bright or too dark—situation that ruins the mood. |
Common Issues
- The overhead chandelier casts harsh shadows on diners' faces and over-brightens the table.: Install a dimmer and lower the fixture to around 30 inches above the table. Also, add a dimmable wall sconce or lamp for gentle, side-light glow to fill in shadows.
- The room looks flat because all the light comes from one overhead source.: Introduce task and accent layers: add a floor lamp near a reading nook, under-cabinet lights on a buffet, and picture lights on art. Place them on separate switches.
- The lighting environment is too warm for everyday tasks and too cool for dinners, and you can't adjust it.: Choose bulbs with a color temperature around 3000K as a compromise, or install a smart dimmer that also changes color temperature if supported. Alternatively, use warm bulbs in task lights and cool in ambient, but ensure they don't clash.
Advanced Tips
- Use 'lighting zones' by placing each layer on a separate circuit and controlling them with smart home scenes or a multi-button wall panel to call up preset moods like 'Breakfast', 'Dinner', and 'Party'.
- For a truly flexible system, install a track or rail system that lets you reposition spotlights along it, so you can change your accent or task lighting as you rearrange furniture or art.
- Consider incorporating natural light with sheer curtains that diffuse sunlight, and add a large mirror to bounce daylight deeper into the room, reducing the need for artificial light during the day.
Final Checklist
- Measure table and room dimensions, and hang pendant or chandelier 30-36 inches above the tabletop for proper proportion.
- Install at least three lighting layers (ambient, task, accent) each on a separate switch or dimmer for independent control.
- Choose bulbs with a warm CCT (2700-3000K) and a high CRI (90+) to flatter skin tones and food.
- Test your complete system at night—use a camera to check for flicker and adjust angles to avoid glare on faces or TV screens.
FAQ
I have a large dining table, how many pendants should I use?
For a table longer than 6 feet, two or three pendants spaced evenly along the center are ideal. A general rule is to place fixtures about 30 to 36 inches apart and no more than 30 inches from the table's edges. Test with temporary lights to ensure each seat has a pool of light. The goal is to cover the table's length without creating dark gaps or over-bright hotspots. Also, coordinate the fixture size and drop to maintain clearance and a balanced look.
What's the best way to avoid glare on a glossy dining table?
Use fixtures with diffusers or shade the bulb so it doesn't directly face the tabletop. Choose a chandelier that directs light upward (indirect) and rely on wall sconces or floor lamps for table-level light. If you must use downlights, angle them slightly toward the center of the room rather than pointing straight at the table. Also, consider a matte finish for the table or a tablecloth. Test with your camera from a seated position to catch any glare.
Should I choose a dimmer or a smart lighting system for my dining room?
A simple dimmer is cost-effective and works well if your bulbs are dimmable and your fixtures are compatible. For advanced control, a smart system allows you to set scenes and adjust from your phone, which is helpful for frequent dining. However, smart systems require compatible bulbs/controllers and may be overkill if you rarely change settings. Your choice depends on your budget and tech comfort. For most people, a good dimmer on each circuit is sufficient and reliable.