What To Check Before Choosing Lighting Layers For A Dining Room
A practical step-by-step guide to what to check before choosing lighting layers for a dining room, including preparation, instructions, common issues, tips, and next steps.
What To Check Before Choosing Lighting Layers For A Dining Room
Before choosing lighting layers for a dining room, evaluate the room's size, ceiling height, natural light, wall colors, furniture layout, and daily usage patterns. Understand the three main layers—ambient, task, and accent—and plan how each will be used at different times. Check the existing electrical setup, dimmer compatibility, and fixture placement to ensure the lighting is both functional and aesthetically pleasing. By considering these factors before purchase or installation, you avoid common mistakes like too-bright or too-dim spaces, glare, and unbalanced visual weight, and create a flexible, welcoming environment for meals, gatherings, and quiet evenings.
Fast Answer
- Before choosing lighting layers, measure the room's dimensions and ceiling height, noting where the table will sit and how much space you have for fixtures to hang safely.
- Examine the natural light at different times of day, the wall and floor colors, and how you use the room (formal dinner vs. casual family meals) to decide which layers need more emphasis.
Before You Start
- Measure the room's length, width, and ceiling height. Record the distance from the floor to where pendant lights or chandeliers will hang, and note any sloped or uneven ceilings.
- Sketch a simple floor plan showing the dining table position, seating, sideboards, and any built-in shelves or artwork that might need accent lighting.
- Take note of existing electrical outlets, light switches, and ceiling junction boxes. Check whether they are located where you want new fixtures and whether dimmers are already installed.
- Track how many hours each day you use the dining room and for what purposes, such as quick breakfasts, formal dinners, homework, or game nights, so you can prioritize which layers matter most.
Step-by-Step Instructions
Map the Room's Shape and Ceiling Constraints
Start by measuring the dining room's length, width, and ceiling height. Record where the table sits in relation to walls, windows, and doors. Note any beams, soffits, or sloped ceiling sections that could limit where you can place fixtures. Use a tape measure and a notebook to sketch the room, marking the exact center of the table and the distance from the ceiling to the tabletop. This matters because the recommended hanging height for a pendant or chandelier is typically about 30 to 36 inches above the table, but that varies with ceiling height and table size. If your ceiling is low, you may need a flush-mount fixture instead. Also check whether there is a single electrical box or multiple outlets, because that determines if you can add separate circuits for different layers. By mapping the room, you avoid buying a fixture that physically doesn't fit or that blocks sightlines.
Assess Natural Light and Wall Contrast
Observe how the room looks at breakfast, midday, and evening. Notice the direction of windows and whether they bring in direct sun or soft diffused light. Check the color of your walls and floor—dark colors absorb light, while light colors reflect it. Also consider the finishes on furniture, curtains, and rugs. If the room is very bright in the morning, you may need less ambient light during the day, but you'll still need task and accent layers for darker evenings. If the room is north-facing and dark, you'll likely need a stronger ambient layer plus accent lights to highlight artwork or a buffet. This assessment helps you decide how many layers are necessary and their brightness. Without this step, you might install multiple fixtures that overpower the space or leave corners in shadow.
Define the Three Layers: Ambient, Task, Accent
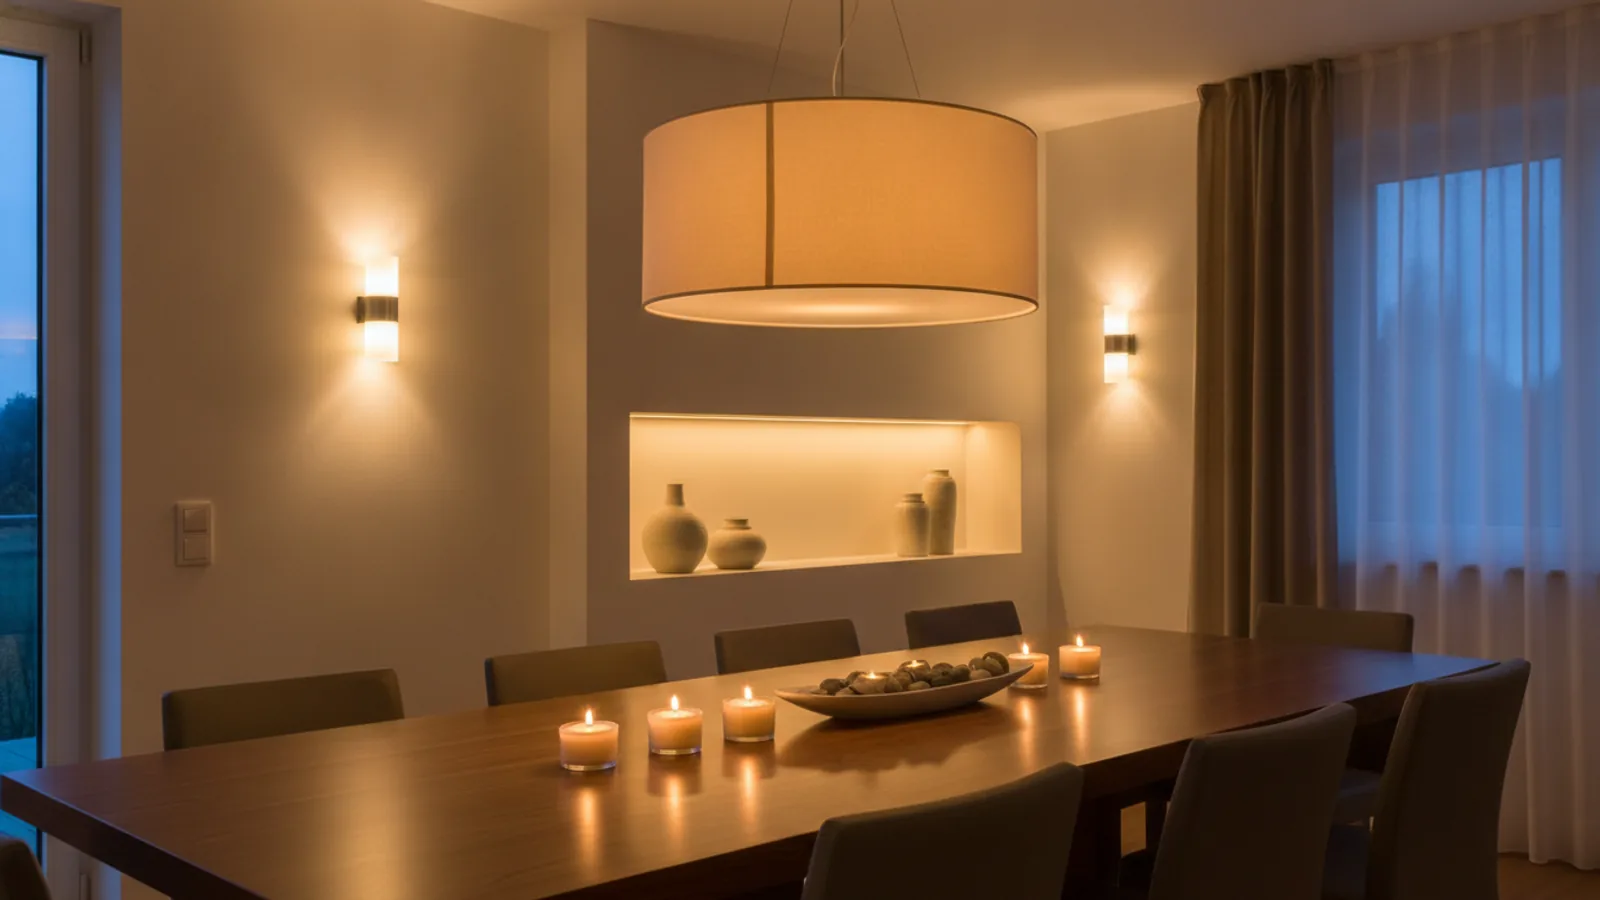
Decide what each lighting layer will do in your dining room. Ambient light provides overall illumination, like from a chandelier or ceiling-mounted fixture, with a soft glow that fills the room. Task light focuses on a specific area, such as a reading nook or a buffet counter, using a table lamp, wall sconce, or adjustable pendant. Accent light highlights a feature, like a painting, a plant, or a decorative wall, using spotlights, track lights, or picture lights. For a dining room, you typically need ambient light for general visibility, task light for nicer looks at food and reading, and accent light to add depth and visual interest. Write down your intended activities—eating, working, playing games—and assign each to a layer. This clear division prevents you from choosing one big fixture that tries to do everything and fails.
Check Dimmers and Bulb Compatibility
Verify whether your existing switches are dimmable and if your chosen fixtures and bulbs are compatible with those dimmers. Look at the manufacturer's specifications for the bulb type—LED, CFL, halogen, or incandescent—and the dimmer's minimum and maximum wattage. Some LED bulbs require special dimmers to avoid flicker or humming. If you plan to use a dimmer, ensure that both the fixture and the bulb are labeled 'dimmable.' For fixtures with multiple bulbs, multiply the wattage to stay within the dimmer's range. Also consider whether you want to control the layers separately or together. This check matters because mismatched dimmers and bulbs can cause buzzing, premature burnout, or a narrow dimming range, ruining the desired ambiance. Test the combination before you finalize the installation.
Determine Placement and Hanging Heights
Based on your floor plan and ceiling shape, decide exactly where each fixture will hang or mount. For a chandelier or pendant over the table, the bottom should be 30 to 36 inches above the table surface, but adjust for your height and the table's size. For a long table, consider a linear suspension fixture that spans the length, or use two pendants spaced evenly. For wall sconces, place them about 60 to 70 inches above the floor to light artwork without glare. For track lighting, angle heads to highlight wall features rather than washing the ceiling. Use masking tape to mark the intended positions on the ceiling or wall, then step back to see how they look. This step ensures that light falls where you need it and that furniture doesn't block the beam.
Plan for Future Adjustments and Flexibility
Think about how you might change the room in the future—moving the table, adding a new sideboard, or repainting. Choose fixtures with adjustable arms, swivel heads, or adjustable cords so you can reposition the light without rewiring. Install dimmers on all layers to adjust the brightness according to the time of day or occasion. Consider putting accent lights on a separate switch or a smart plug that you can control from your phone. This flexibility matters because your needs will change, and you don't want to redo the electrical work. Also, keep a record of the fixtures' specifications, such as wattage and dimensions, so you can easily replace bulbs or parts. Planning for flexibility now makes your lighting design adaptable for years.
Quick Reference
| Situation | Action | Why it helps |
|---|---|---|
| The room feels too dark even with the chandelier on and the table is well lit but the corners are shadowed. | Add a floor lamp in one corner and a small table lamp on a sideboard, both with warm bulbs, and put them on a separate switch or plug-in dimmer. | This introduces an ambient layer that softly fills the room, balances the contrast, and makes the space feel welcoming without harsh spots. |
| You often host dinner parties and want to create a cozy, intimate mood without making the room feel like an operating theater. | Install a dimmer on the main chandelier and add a few candles or battery-operated LED lights in decorative holders on the table and sideboard. | Lowering the overhead light to about 50 percent and using small warm sources brings down the overall brightness and adds a flickering glow that feels welcoming. |
| After moving in, you find that the existing recessed downlights wash the walls with flat light and the dining table has no focal point. | Replace two of the recessed downlights with adjustable eyeball trims and angle them to highlight a large piece of art, then add a small pendant above the table. | Directional accent lighting creates visual interest on the wall, while the pendant provides a focal point and task light for the table, improving both function and style. |
Common Issues
- The chandelier hangs too low so it blocks the view across the table, and people bump their heads when standing up.: Raise the chandelier so the bottom is at least 30 inches above the table surface, or replace it with a flush-mount fixture if the ceiling is very low. Use a chain or cord to adjust the height, and check that the cord is properly shortened.
- The LED bulbs flicker when you use the dimmer, even though they are dimmable.: Check that the dimmer is rated for LED loads and that the total wattage of the bulbs falls within the dimmer's range. If the problem persists, switch to a different brand of LED bulbs or upgrade to a compatible leading-edge or trailing-edge dimmer listed for your bulbs.
- The room still has uneven lighting with bright spots and deep shadows, despite having several fixtures.: Add more ambient light sources such as a wall sconce or a floor lamp to fill the shadows, and adjust the aiming of any track heads. Use diffusers on existing fixtures to soften the light and consider repainting dark walls with a lighter color to reflect more light.
Advanced Tips
- Measure the color temperature of your bulbs using the Kelvin scale and pick a single warm tone (around 2700K) for all layers to avoid a mismatched, clinical look.
- Use separate wall switches for each layer, and label them clearly so you can turn on just accent lights for a quick evening drink without shutting off the room entirely.
- Consider using a smart lighting system with scenes—like 'Dinner', 'Bright', and 'Cozy'—to change all layers together, but verify that the fixtures and bulbs support the protocol you choose.
Final Checklist
- I have measured the ceiling height and checked that the chosen fixtures will hang at a safe 30-36 inches above the table.
- I have verified that all fixtures, bulbs, and dimmer switches are compatible and I have noted the correct wattage range.
- I have planned separate controls for ambient, task, and accent layers so I can use them independently or in combination.
- I have considered future changes and chosen fixtures with adjustable features or flexible placement options.
FAQ
Do I really need all three lighting layers in a small dining room?
In a small room, you can combine layers to save space, but you still need each function. For example, a pendant with a dimmer can serve as both ambient and task light, while a wall sconce or small picture light can act as accent. The key is to have the ability to light the room fully, focus on the table, and highlight a feature, even if you use fewer fixtures.
How do I choose between a chandelier and multiple pendants for a long table?
Measure the length of your table. If it's 72 inches or longer, two or three smaller pendants spaced evenly along the center line can provide more even light and a modern look. For shorter tables, a single chandelier or linear suspension works well. Ensure the total width of the pendants doesn't exceed the table's width to avoid awkward overhang.
What should I do if my ceiling is sloped or has beams?
Use a swivel adaptor or a pendant with an adjustable cord to align the fixture so it hangs plumb. For beams, you can mount track lights directly on the beam or use a chain adapter to clear it. Always check the clearance above the fixture for the canopy, and consider hiring an electrician to reroute wiring if needed.